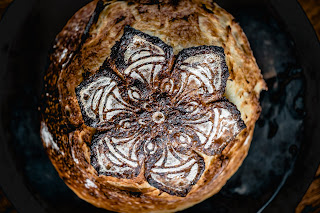
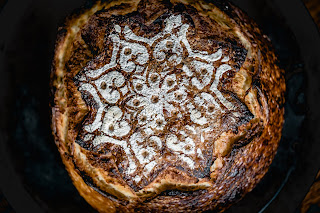
Semolina flour though does not behaves the same as wheat flour. It has its advantages and disadvantages and, I always underline, you do not know well a flour until you bake bread made 100% from that specific flour.
It is yellow in colour, and it has more gluten but with a lower quality and this means that you need to treat it with care when preparing the dough. I would suggest lower hydration than normally used for strong bread flour. I went for 70% hydration for this recipe and found it the perfect match for my flour.
Because I like personally lean more from a video than from a photo with text, I present you this recipe in a structured video.
I suggest you also watch the previous video from the recipe 50% Semolina Sourdough Bread as there I go into even more details about the semolina flour.
Ingredients: (1718g, 70% hydration)
- 910g semolina flour
- 610ml water
- 180g semolina sourdough starter
- 18g salt
Directions:
- [Day 1, Saturday, 8:00] Scaling. Start by scaling your ingredients using a balance and put them on the table to ensure that nothing is forgotten.
- [Day 1 Saturday, 8:00] Mix water + semolina flour. Mix only the flour with water (slightly warmed up for 1 minute in the microwave) until well combined. Do not knead at this stage, just ensure there is no unincorporated dry flour resting in the bowl and that's it. I put the dough in the bread proofer set at 27ºC. Please note that even if the bread proofer is set at 27ºC, the dough temperature barely reaches 24-25ºC. I then let it sit for 2 hours for the autolyse.
- [Day 1 Saturday, 10:00] Sourdough starter. Add the starter over the dough and mix by hand or with a standing mixer for 10 minutes. After mixing, let the dough relax for 1 hour.
- [Day 1 Saturday, 11:00] Salt. Add the salt and mix again for 5 minutes. Then, let the dough relax again for 1 hour.
- [Day 1, Saturday, 12:00] Divide and Stretch and Fold. Take the dough out of the bowl put it on the slightly wet table board and divide it into 2. Stretch and fold each piece on the board and place them in squared glass bowls. Let them sit covered for 1 hour and 30 minutes.
- [Day 1, Saturday, 13:30] Lamination. Take each piece out of the bowl and do the lamination. Let the dough rests for 1 hour and a half.
- [Day 1, Saturday, 15:00] Coil fold 1. Start now with a set of 2 coil folds performed straight in the bowls. Do the first coil fold set in each glass bowl and let them sit for 1 hour.
- [Day 1, Saturday, 16:00] Coil fold 2. Do a second set of coil folds in the glass bowls and let them sit for 45 minutes.
- [Day 1, Saturday, 18:00] Shape the loaves on the lightly floured board. Place the dough face down into well-floured bannetons. Repeat the process for the second piece of dough. [PH 4.2]. Place the bannetons in the fridge overnight.
- [Day 2, Sunday, 9:00] Score. Before scoring, you need to preheat the oven to reach 250ºC.
Reverse the banneton on a peel sprinkled decorate and score the bread as you like. Immediately after, slide the loaves into the oven. Add some hot water to a tray inside to create steam. - Bake at 250ºC for 20 minutes then reduce to 220ºC and continue for 20 minutes more.
- [Day 2, Sunday, 9:40] Cool. The bread needs to cool for at least 2 hours until it reaches room temperature. The cooking process continues slowly even after taking the bread out of the oven, so this is why it is important to not skip this step and to resist cutting it too early. If you can, of course...
- [Day 2, Sunday, 11:40] Cut. Now is the big moment to enjoy a slice of bread...


0 comments:
Post a Comment