RSS

Baked doughnuts with discarded sourdough

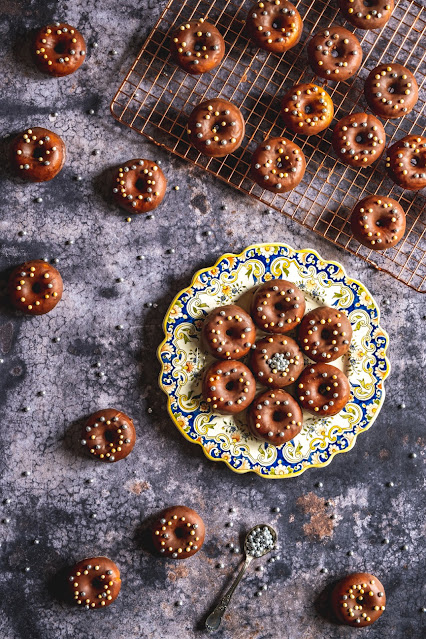
This was the first time I tried doughnuts with sourdough. I had the idea in mind for a while but never had the initiative to actually put it into practice. My previous recipe of doughnuts turned out fantastic when baking them but after cooling they reduced their size and this was a bit disappointing (for me at least). So the motivation to try the version with sourdough went high. Not classic sourdough, because that requires a bit of preparation upfront but discarded sourdough. I always have a jar of discarded sourdough in my fridge and when is filled I know I have to bake something with it. 
I have 3 sourdoughs that I feed regularly but not all of them stay out of my fridge at the same time. The first one is my normal 100% hydration white wheat sourdough (Maya). The second is a rye sourdough at 100% hydration that I built starting from Maya 2-3 years ago and the last one is a stiff sourdough (50% hydration) that I normally use for sweet doughs. Normally only one of them is fed at room temperature and the others lay inside the fridge I feed them once a month. This time I did the opposite, I put Maya to sleep and revived my other 2 at room temperature. This is how I arrived having a jar of discarded sourdough based on a stiff starter and rye. You can understand now that my discarded sourdough is not at 100% hydration so if yours is, keep in mind to add more flour to adjust the hydration of the final dough.
These doughnuts turned out great! No deflation after baking, they kept the shape exactly as they were after baking. No sour taste either even if it came from discarded sourdough! I mentioned in the recipe the ph before baking especially to prove the lack of sourness.
I love them and my kids too. For sure, it will not be the first and the last time I do them with or without glazing.

Baked doughnuts (version 3)

 I love doughnuts but the idea of frying them makes me stay away from preparing them. I know they are tastier when fried, however, it does not compensate for the healthy aspects. That's why I almost always bake the doughnuts.

This is a version of dough where the rising agent is the baking powder. There is nothing wrong with baking powder, I do many cakes based on baking powder. The only thing that I do not like is that after baking, most of these cakes/sweets shrink a bit. It is the case for these doughnuts too.

Making doughnuts with this recipe has a big advantage: it is very quick! The baking takes time but the way I manage is to set an alarm every 3 minutes and 45 seconds and I take out the doughnuts and scoop another batch. During the baking, I do plenty of other things, like cleaning the kitchen or putting dishes on the cupboard so I do not waste too much time.

I like this version better than the ones I baked and published on my blog so far. (see Baked doughnuts and Baked doughnuts (version 2) )

There is however a version that I never tried before and tempts me so much.... wait for my next post.

Sourdough kougelhopf

Mommy, you made a google loaf! These were the words of my daughter when she saw this cake followed by a nice laugh together.

I've done sweet dough with sourdough before by transforming recipes based on baking powder into sourdough-based ones. Nothing new here but it is the first time I have followed a professional recipe. This actually comes to add pieces of knowledge to my quest to understand more about these mysterious creatures generically called sourdough.

I've also had a quest in perfecting recipes based on baking powder but I found a few disadvantages that almost made me give up. 

The first is the fact that all rely on the chemical reaction in the oven. There is no way to guess its behaviour in the oven only by looking at the dough before. Will it rise enough? Will it crack? Will it be soft inside? With sourdough, the dough is already well-risen when the dough is put into the oven and this gives a good prediction about what you'll gonna get.

The second thing that I do not like is that the baking powder-based cakes deflate slightly when taken out from the oven. This never happens visibly when the dough is based on sourdough.

There are disadvantages to baking with sourdough too: it takes time and you may get it sour!  Unlike bread dough, where you need to perform a series of steps, this dough is mixed, let to rest for 30 minutes, and then left alone to rise overnight in a warm place. The used starter is not a liquid one but a stiff one. Although you can quickly transform a liquid starter into a stiff starter in only one step this is not enough. There is a reason why pasta made is used for sweet dough: it reduces acidity. Pasta made has its own preparation steps in order to get it right for the dough and this actually takes one day: start with a sourdough bath, to reduce the acids, then feed it 3 times at shorter intervals (kept at warm temperature) to get it very active.

This was my first trial to get it properly done (in line with the indications) and I did my best to align. The ph of the starter I did not get it right during the feeds, I'll need to tinker with some methods/temperatures to get it perfect next time.

Analysing the cake, here are my thoughts: the rise was good but I believe there is a place for better; the taste was interesting and nice but I detected a bit of sourness that shouldn't be there. The cause is still related to the power of the starter to rise the dough and temperature.

If you want to know the original recipe, I invite you to check the book "Coffret Traité de boulangerie au levain" by Thomas Teffri-Chambelland. I have the French version but I understood there is an English version too. Please note that this book is not for beginners... it's about the science of baking and there are a few recipes presented too. But if you are a sourdough geek, I can only recommend this book(s). No hidden publicity here, just my honest opinion as a homemaker with a passion.

I will test more recipes with sweet sourdough in the future although clearly not as often as I'll do for bread. For this recipe, I'd make a few more adjustments to make it perfect but I have to tell you that my kids loved it as such. Here is the recipe:

Whole Spelt Sourdough


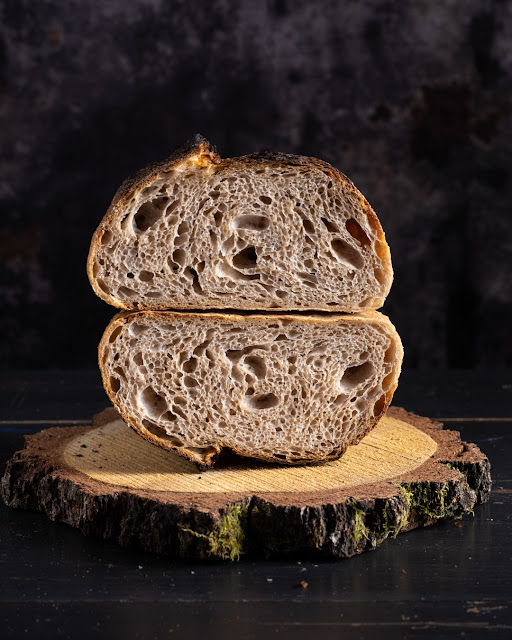
I need to confess that I have a love-and-hate relationship with open-crumb sourdough bread. While I am super excited when I cut it and see these lovely big alveoli and feel proud that I managed to catch the fermentation just at the right moment, my excitement goes lower when I agree with my daughter saying "mommy, there are too many big holes in this slice for the butter to stay!" To this practicality issue, no argument that "it is the best fermented bread" and that "I mastered the process" does not stay up.
Bread is not only about the size of the holes inside. There are many aspects to consider like health, taste flavours or the purpose for which it was made.
To be honest, I did not plan for an open crumb. What I was up to was to track the ph and make the correlation with the degree of fermentation. I used to believe that the best time to shape the loaves was between 4.2 to 4, with higher chances for open crumb on the lower side. The type of flour is a variable that intervenes in the process too and I was fully aware of that.

I made 3 changes in my classic process for this bake and now I do not know which one had the major impact. Therefore, with my next bakes, I will need to isolate the changes, one by one, to identify the major one.
First, I proofed the dough at a higher temperature. Or at least this is what I thought when I set my bread proofer at 32ºC. This was tricky because my kitchen was cool (~17ºC) and every step influenced the temperature of the dough which fluctuated between 19-27ºC.
Second, I changed the starter. I have a second starter derived from my classic wheat starter but fed with rye. I usually keep this one in the fridge and take it out once or every 2 months to feed it. I recently read a book where the baker was saying that in his bakery he uses only rye starter regardless of what bread he was targeting. I was intrigued and wanted to give it a try.
The third was the ph value at shaping. While I was waiting for the dough to pass the 4.2 ph mark before shaping, I had the feeling I needed to shape it earlier as my eye on the dough was rushing me for the shaping step. Without a ph meter I think I would have shaped the dough somewhere between the coil

fold set 2 and 3. But I resisted, thinking... scientific measurement might be more precise than my eye. Even more, after shaping I kept the loaves in bannetons until reached the 4.2 level and just after, I put them in the fridge. 
The next day, before the bake, I measured again the ph and I had a significant drop to 4.09. Interesting that too, because most of my loaves were going into the oven between 3.9-3.8.

What an adventure! And I am so keen to test more on this recipe. There are very few adjustments I would make to it. For example, I would put it in the fridge just a bit earlier hoping to get taller bread and maybe a more uniform distribution of the alveoli. And maybe keep it more in the fridge?
I feel that the rye starter gave tremendous power to the yeasts and bacteria and they produced an impressive amount of CO2 to pump up the bubbles early. I will use again this starter, I have a good feeling about it now.
As for the temperature, I'll test keeping it high to see the influence on behaviour and taste. Now, during the cooler time of the year is also justified to keep those microorganisms happy.

100% Semolina Sourdough Bread

I've played so much lately with semolina flour for making bread because I like its taste and because I find it such a fantastic type o flour. 
Semolina flour though does not behaves the same as wheat flour. It has its advantages and disadvantages and, I always underline, you do not know well a flour until you bake bread made 100% from that specific flour.
It is yellow in colour, and it has more gluten but with a lower quality and this means that you need to treat it with care when preparing the dough. I would suggest lower hydration than normally used for strong bread flour. I went for 70% hydration for this recipe and found it the perfect match for my flour.

Because I like personally lean more from a video than from a photo with text, I present you this recipe in a structured video.

I suggest you also watch the previous video from the recipe 50% Semolina Sourdough Bread as there I go into even more details about the semolina flour.