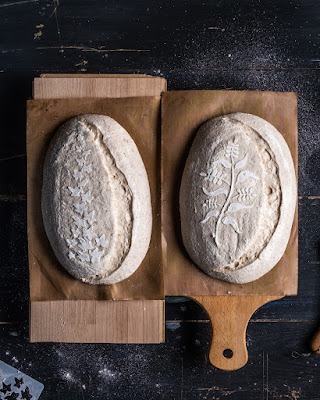
Take a bread recipe, make it until you are satisfied with the result and then you can play changing the flour. This is what I am doing with this recipe: I changed the spelt flour with rye flour in my previous recipe. The result may have the same look but there are big changes to the dough and I'll explain why.
Rye - Whole Wheat Sourdough Bread
Take a bread recipe, make it until you are satisfied with the result and then you can play changing the flour. This is what I am doing with this recipe: I changed the spelt flour with rye flour in my previous recipe. The result may have the same look but there are big changes to the dough and I'll explain why.
Spelt - Whole Wheat Sourdough Bread
First time I tried it I was not very happy with its dough structure and I over fermented it. The bread was perfectly eatable but for sure, was not what I expected it to be.
With the lessons learned from this first failed attempt, I focused on improving 2 things: dough handling and reduced fermentation time while keeping the list and quantity of ingredients exactly the same. To build a better structure, I added a 4th coil fold. For the fermentation, I definitely understood that this combination of flours, had to have a higher ph than 4.15 (as my previous test was). I shaped it then at ph 4.33 and put it in the fridge at 4.25. Only these 2 changes transformed a recipe from zero to hero.This is a perfect example of improving the method and not changing the ingredients or their quantity. The method matters! There are many methods out there that make fantastic loaves of bread but you need to master yours and know the implications of changing it.
Chocolate festive cake
Chocolate festive cake
This was the cake for my husband's birthday last week. It was also the test cake for my son's birthday cakes. All the 3 followed the same principles, one sponge cake cut into layers with chocolate ganache between them. Similar compositions and tastes but three different looks. You may find the ones of my son in my previous 2 posts.
Every cake had a different target: this one to look more festive, the "5" cake to be a child's cake and the last one to be easily transported. Which one do I like the best? Difficult to say as I associated them with special occasions. Doing all of them in one week was a marathon but with every challenge like this comes a lot of lessons learned.
The first lesson learned was to master the sponge cake both in cocoa or classic versions. Learning its tricks took me sometime over the years and now I can happily say that I feel comfortable baking them.
A second lesson learned was to play with ganache. This thing is super sensitive to temperature and depending on the purpose you might want a thicker or thinner texture. I found myself putting the bowl sometimes in the microwave to heat it a bit and sometimes in the fridge to cool it. It is however the easiest cake filling that you can do (after the basic whipped cream of course). I like simple things for basic staff and focus more on the artistic part of it.
You may find the complete recipe for this cake below.
Race cake
This was the anniversary birthday cake of my son. It took me a lot of time to prepare it and even more to make all the decorations. do I regret spending so much time on just a cake? Not even a minute. I made it with all my heart and I would do it again if needed.
I divided the making of this cake over 2 days: on the first day, I baked the sponge cakes and prepared the ganache, on the second day I shaped and layered them and prepared all the decorations.
The decorations took me almost a full day and I was helped by the little one, placing the big white and black squares on the side. My daughter participated also in the decoration process so it looked more like a family cake.
But a good cake doesn't only have to look nice it also needs to taste good. The combination of cocoa sponge cake and chocolate ganache is heaven. The guests appreciated the cake to be light, not overly sweet and delicious. The kids invited to the party loved it too, as most of the plates I cleaned up after were empty.
I was very careful with the sugar on this cake. There is a huuuuge (for me at least) amount of sugar paste (~750g) to cover the cake. The sponge cakes have 200g of sugar each, but I used only 1.5 sponge cakes, so I can make a total of 300g. There is also a good quantity of sugar in chocolate and there is no need to add more. Then another 100g for the syrup. If you start counting, the sugar sums up, however, remember that chocolate in its pure state is bitter and children do not love it like that. So a certain amount of sugar in this cake is a must. The trick was to find the right balance and I can happily say it was perfect.


