RSS

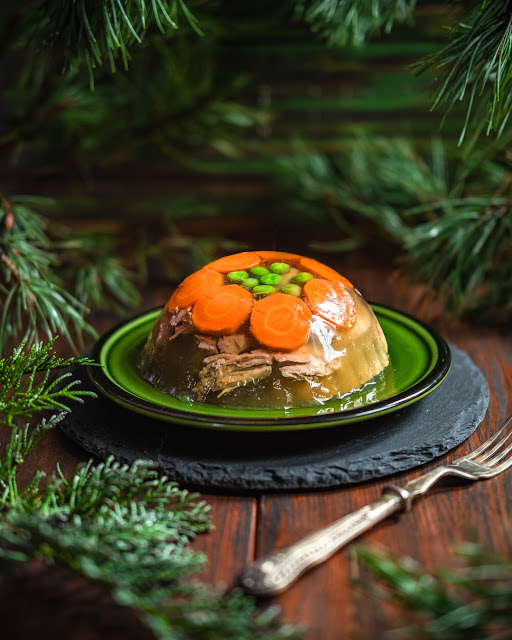
Pork-turkey jelly / aspic (Piftie sau racituri de porc si curcan) in Instant Pot

I have to recognise that this year I made "piftie" for the first time in my life although it is a very popular and traditional dish for Christmas and New Year in my birth country. My mother is making this dish for the New Year with regularity and I used to eat it with pleasure.

I almost forgot about this dish since last year when a good friend of mine (who is a fantastic chef) offered me a bowl of this traditional dish and it was so good that it imprinted well in my mind and triggered a desire to try to make it myself. Throughout the year I brainstormed about where I should buy the right ingredients for it. Recently, when visiting a Romanian shop, I saw what I needed: pork ears. You can imagine that I bought and bring them home with great motivation to launch myself in making this dish.

Pork ears and pork legs are perfect but I only had pork ears for my test. It worked very well with only pork ears too. There is a reason why this dish can be made from ears, legs or skin of pork: the natural gelatin. This is the key to create the jelly aspect that transforms it from a normal soup. The turkey is added only for having a meat addition inside the jelly. It exists a version exclusively made from turkey or chicken but you need to add extra gelatin as these birds do not have enough to solidify the soup.

There is a lot of garlic in this recipe (2 heads) as it is one of its main tastes. You can play with how strong you want the garlic taste to be by leaving the garlic in or straining it out. It is a personal choice. I chose to strain it but I feel that keeping the garlic inside could have been a better choice.

This dish is served cold, that's why the original name "racituri" means "cold things".

The Instant Pot helps a great deal with this recipe because it cooks the meat in 45 minutes so well that it detaches itself from the bones. Without an Instant Pot, the second boil takes 2-3 hours on low heat.

Greek-style chicken and rice in Instant Pot

Before knowing the Instant Pot, I thought there would be nothing to impress me in terms of cooking devices. I am not too keen to fill in my kitchen with appliances that I use once a year. This is actually a reason why I hesitated so much in buying it. I had an old pressure cooker that I used rarely and mainly for soups. The strongest point that actually convinced me to buy it was the simplicity of using it. One pot to make all inside, reduce the number of dishes to clean and the time invested in cooking.
Since then, Instant Pot was my main way of cooking soups, stews, side dishes, meat and even some cakes.

This is a Mediterranean-style dish and I arrived to make it a couple of times already. Both the meat and the rice are cooked in stages and the result is absolutely delicious. The "cherry on the cake" is the yoghurt sauce that cuts any heaviness of the dish. 

Baked doughnuts with discarded sourdough

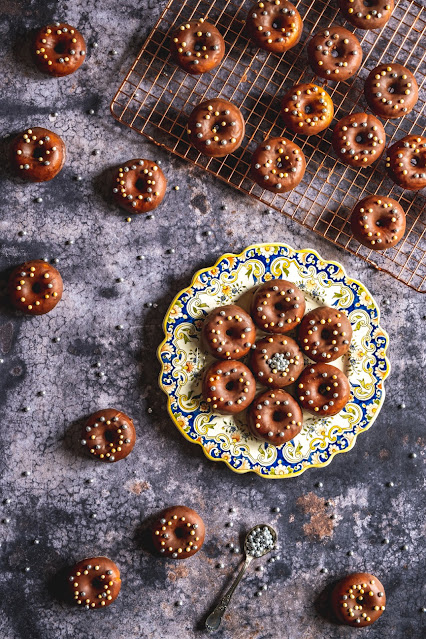
This was the first time I tried doughnuts with sourdough. I had the idea in mind for a while but never had the initiative to actually put it into practice. My previous recipe of doughnuts turned out fantastic when baking them but after cooling they reduced their size and this was a bit disappointing (for me at least). So the motivation to try the version with sourdough went high. Not classic sourdough, because that requires a bit of preparation upfront but discarded sourdough. I always have a jar of discarded sourdough in my fridge and when is filled I know I have to bake something with it. 
I have 3 sourdoughs that I feed regularly but not all of them stay out of my fridge at the same time. The first one is my normal 100% hydration white wheat sourdough (Maya). The second is a rye sourdough at 100% hydration that I built starting from Maya 2-3 years ago and the last one is a stiff sourdough (50% hydration) that I normally use for sweet doughs. Normally only one of them is fed at room temperature and the others lay inside the fridge I feed them once a month. This time I did the opposite, I put Maya to sleep and revived my other 2 at room temperature. This is how I arrived having a jar of discarded sourdough based on a stiff starter and rye. You can understand now that my discarded sourdough is not at 100% hydration so if yours is, keep in mind to add more flour to adjust the hydration of the final dough.
These doughnuts turned out great! No deflation after baking, they kept the shape exactly as they were after baking. No sour taste either even if it came from discarded sourdough! I mentioned in the recipe the ph before baking especially to prove the lack of sourness.
I love them and my kids too. For sure, it will not be the first and the last time I do them with or without glazing.

Baked doughnuts (version 3)

 I love doughnuts but the idea of frying them makes me stay away from preparing them. I know they are tastier when fried, however, it does not compensate for the healthy aspects. That's why I almost always bake the doughnuts.

This is a version of dough where the rising agent is the baking powder. There is nothing wrong with baking powder, I do many cakes based on baking powder. The only thing that I do not like is that after baking, most of these cakes/sweets shrink a bit. It is the case for these doughnuts too.

Making doughnuts with this recipe has a big advantage: it is very quick! The baking takes time but the way I manage is to set an alarm every 3 minutes and 45 seconds and I take out the doughnuts and scoop another batch. During the baking, I do plenty of other things, like cleaning the kitchen or putting dishes on the cupboard so I do not waste too much time.

I like this version better than the ones I baked and published on my blog so far. (see Baked doughnuts and Baked doughnuts (version 2) )

There is however a version that I never tried before and tempts me so much.... wait for my next post.

Sourdough kougelhopf

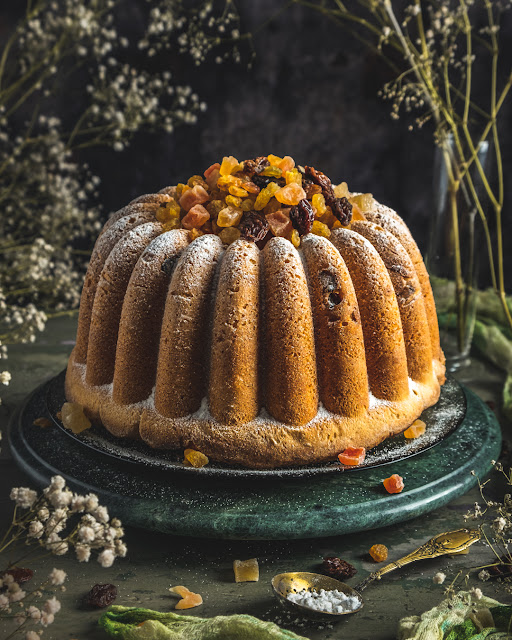
Mommy, you made a google loaf! These were the words of my daughter when she saw this cake followed by a nice laugh together.

I've done sweet dough with sourdough before by transforming recipes based on baking powder into sourdough-based ones. Nothing new here but it is the first time I have followed a professional recipe. This actually comes to add pieces of knowledge to my quest to understand more about these mysterious creatures generically called sourdough.

I've also had a quest in perfecting recipes based on baking powder but I found a few disadvantages that almost made me give up. 

The first is the fact that all rely on the chemical reaction in the oven. There is no way to guess its behaviour in the oven only by looking at the dough before. Will it rise enough? Will it crack? Will it be soft inside? With sourdough, the dough is already well-risen when the dough is put into the oven and this gives a good prediction about what you'll gonna get.

The second thing that I do not like is that the baking powder-based cakes deflate slightly when taken out from the oven. This never happens visibly when the dough is based on sourdough.

There are disadvantages to baking with sourdough too: it takes time and you may get it sour!  Unlike bread dough, where you need to perform a series of steps, this dough is mixed, let to rest for 30 minutes, and then left alone to rise overnight in a warm place. The used starter is not a liquid one but a stiff one. Although you can quickly transform a liquid starter into a stiff starter in only one step this is not enough. There is a reason why pasta made is used for sweet dough: it reduces acidity. Pasta made has its own preparation steps in order to get it right for the dough and this actually takes one day: start with a sourdough bath, to reduce the acids, then feed it 3 times at shorter intervals (kept at warm temperature) to get it very active.

This was my first trial to get it properly done (in line with the indications) and I did my best to align. The ph of the starter I did not get it right during the feeds, I'll need to tinker with some methods/temperatures to get it perfect next time.

Analysing the cake, here are my thoughts: the rise was good but I believe there is a place for better; the taste was interesting and nice but I detected a bit of sourness that shouldn't be there. The cause is still related to the power of the starter to rise the dough and temperature.

If you want to know the original recipe, I invite you to check the book "Coffret Traité de boulangerie au levain" by Thomas Teffri-Chambelland. I have the French version but I understood there is an English version too. Please note that this book is not for beginners... it's about the science of baking and there are a few recipes presented too. But if you are a sourdough geek, I can only recommend this book(s). No hidden publicity here, just my honest opinion as a homemaker with a passion.

I will test more recipes with sweet sourdough in the future although clearly not as often as I'll do for bread. For this recipe, I'd make a few more adjustments to make it perfect but I have to tell you that my kids loved it as such. Here is the recipe:

Whole Spelt Sourdough


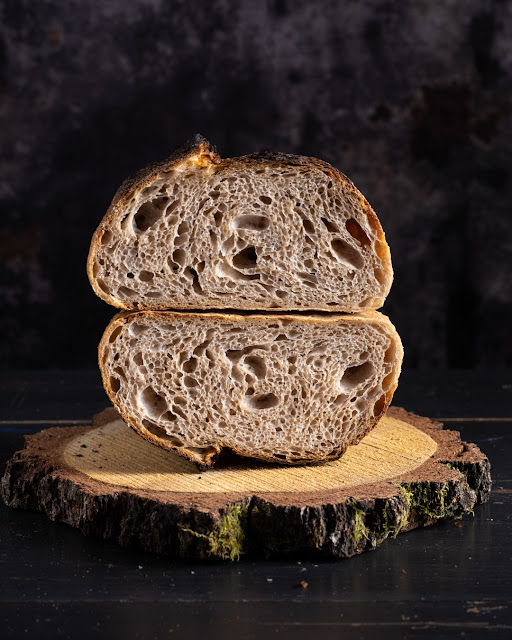
I need to confess that I have a love-and-hate relationship with open-crumb sourdough bread. While I am super excited when I cut it and see these lovely big alveoli and feel proud that I managed to catch the fermentation just at the right moment, my excitement goes lower when I agree with my daughter saying "mommy, there are too many big holes in this slice for the butter to stay!" To this practicality issue, no argument that "it is the best fermented bread" and that "I mastered the process" does not stay up.
Bread is not only about the size of the holes inside. There are many aspects to consider like health, taste flavours or the purpose for which it was made.
To be honest, I did not plan for an open crumb. What I was up to was to track the ph and make the correlation with the degree of fermentation. I used to believe that the best time to shape the loaves was between 4.2 to 4, with higher chances for open crumb on the lower side. The type of flour is a variable that intervenes in the process too and I was fully aware of that.

I made 3 changes in my classic process for this bake and now I do not know which one had the major impact. Therefore, with my next bakes, I will need to isolate the changes, one by one, to identify the major one.
First, I proofed the dough at a higher temperature. Or at least this is what I thought when I set my bread proofer at 32ºC. This was tricky because my kitchen was cool (~17ºC) and every step influenced the temperature of the dough which fluctuated between 19-27ºC.
Second, I changed the starter. I have a second starter derived from my classic wheat starter but fed with rye. I usually keep this one in the fridge and take it out once or every 2 months to feed it. I recently read a book where the baker was saying that in his bakery he uses only rye starter regardless of what bread he was targeting. I was intrigued and wanted to give it a try.
The third was the ph value at shaping. While I was waiting for the dough to pass the 4.2 ph mark before shaping, I had the feeling I needed to shape it earlier as my eye on the dough was rushing me for the shaping step. Without a ph meter I think I would have shaped the dough somewhere between the coil

fold set 2 and 3. But I resisted, thinking... scientific measurement might be more precise than my eye. Even more, after shaping I kept the loaves in bannetons until reached the 4.2 level and just after, I put them in the fridge. 
The next day, before the bake, I measured again the ph and I had a significant drop to 4.09. Interesting that too, because most of my loaves were going into the oven between 3.9-3.8.

What an adventure! And I am so keen to test more on this recipe. There are very few adjustments I would make to it. For example, I would put it in the fridge just a bit earlier hoping to get taller bread and maybe a more uniform distribution of the alveoli. And maybe keep it more in the fridge?
I feel that the rye starter gave tremendous power to the yeasts and bacteria and they produced an impressive amount of CO2 to pump up the bubbles early. I will use again this starter, I have a good feeling about it now.
As for the temperature, I'll test keeping it high to see the influence on behaviour and taste. Now, during the cooler time of the year is also justified to keep those microorganisms happy.

100% Semolina Sourdough Bread

I've played so much lately with semolina flour for making bread because I like its taste and because I find it such a fantastic type o flour. 
Semolina flour though does not behaves the same as wheat flour. It has its advantages and disadvantages and, I always underline, you do not know well a flour until you bake bread made 100% from that specific flour.
It is yellow in colour, and it has more gluten but with a lower quality and this means that you need to treat it with care when preparing the dough. I would suggest lower hydration than normally used for strong bread flour. I went for 70% hydration for this recipe and found it the perfect match for my flour.

Because I like personally lean more from a video than from a photo with text, I present you this recipe in a structured video.

I suggest you also watch the previous video from the recipe 50% Semolina Sourdough Bread as there I go into even more details about the semolina flour.


Blueberry muffins (version 2)

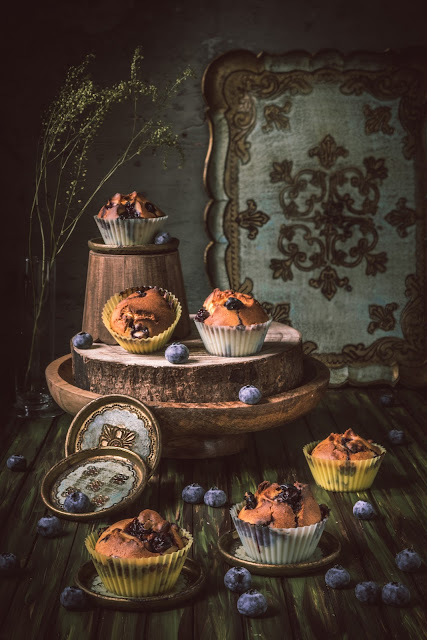
I asked my son what he would like to make the muffins with. I offered different options but he was firm that his preference was blueberries. He then assisted me and helping with some steps in the preparation of these beautiful muffins. 

This is a super simple and quick recipe with ingredients that you usually keep in your fridge, with the exception of blueberries of course. You do not have blueberries? No problem, pick another fruit.

It is not the first time that I do blueberry muffins, here you can find my first version. I use these muffins as a snack for my kids during the school day, so keeping the sugar at a low quantity is important for my kid's general health.

Coconut Bundt


There are times I wish I lived in another century, but then I remember that I wouldn't enjoy all the remarkable progress the humans made since then. But I can close my eyes and dream that I was leaving in a countryside castle and enjoyed the style of those times. Then I can just open my eyes and I am back to our times. So convenient right?

I leave you to imagine the same and and a bit more... a bundt cake made with coconut.


Plum Dumplings


Ingredients:

Dough:

  • 550g boiled/steamed potatoes
  • 150g all-purpose flour
  • 80g sugar
  • 2 yolks
  • a pinch of salt
Plums:
  • 20 small plums
  • 40g sugar
  • 1 teaspoon cinnamon
Coating:
  • 150g breadcrumbs
  • 60g butter
  • 60g sugar
  • 1 teaspoon cinnamon


Directions:
  1. Prepare the plums by cutting them only on one side to remove the pits. You should not cut them in halves completely, the 2 parts need to stay together to maintain the integrity of the plum.
  2. Add over the sugar and cinnamon and stir the plums with your hand. Set aside.
  3. Prepare the coating by melting the butter in a pan and adding the bread crumbs.
  4. Toast the breadcrumbs on low heat and stir until the colour is a beautiful light golden brown. 
  5. Turn off the heat and add the sugar and cinnamon, Set the pan aside and let's start the dough.
  6. For the potatoes, I prefer to peel them first and steam them. Smash or grate the potatoes (without peeling obviously if you chose the boiling option)
  7. Add over the sugar, yolks, flour and salt and mix. You should be able with all these ingredients to form a sticky dough using your hand. If it feels too wet, you may add one extra tablespoon of flour. It is not recommended to use a mixer at this stage to avoid gluten formation and because the dough will turn too elastic and very sticky.
  8. Portion the dough into 35g balls. This is the quantity needed to cover the plums.
  9. Dress each plum with the dough from a ball, sealing well the dough around. Repeat this for all the plums.
  10. Boil 2-3 litres of water in a pot and add 10 dressed plums using a slotted spoon.
  11. Let them boil on medium heat until they float, then remove them to a plate. Put the second batch of plum balls to boil in the pot while we are coating the first batch.
  12. Roll the hot dumplings in the toasted breadcrumbs until they are completely covered. Proceed in the same way with the remaining plums.

You can serve them warm or cooled.


Recipe inspired from here.

Lemon Bundt Cake

When autumn starts to install, I too begin making bundt cakes.

I made this cake recipe for the occasion of my daughter's birthday. To be sure it would be a successful cake, I did it 3 times. The first time was a catastrophe. If you recall, I have a bundt cake book that I love in terms of a combination of ingredients but it is way unbalanced when it comes to quantities. So, every cake is a real challenge. But I do not give up, because this is how I learn to adjust the recipes. The more I fail, the more I search for the mistake and I fix it with the next bake. This is how I grow my experience with baking.

The first one rose nicely in the oven but when cooling it fell down to a level lower than before the baking. I've learned 3 lessons: first, the butter needs to be at room temperature when I bake this type of cake,  second, never trust the timing mentioned in the recipe book and third, if you feel there is not enough flour to make a consistent batter, simply add it. My cake was undercooked in the middle and overcooked on the crust. The combination of those factors led to the cake falling down. 

The second bake was a control bake and is the one you see in the photo. It turned out with a great crumb, exactly as I wished for. The third one was the cake that my daughter brought to school for her birthday and went exactly like the second one. 

I learned my lessons and I've put another brick in my baking experience.

50% Semolina Sourdough Bread


Semolina is my new obsession. I knew about semolina since I was a child and my mother was making milk porridge with it. It was one of my preferred breakfasts. Little did I know that it will later become one of my favourite ingredients for bread.


To make fantastic sourdough bread with any kind of flour you need to understand its characteristics.

Semolina (or semola rimacinata di grano duro) is made from hard wheat not from the common wheat usually used for bread flour. Semolina is very popular for making pasta, couscous, and porridge but it can be successfully used in bread as well.

Semolina has a coarser texture than classical flour but should not be confused with rice or corn semolina. Semolina comes from durum triticum wheat and when ground in a coarser texture is called semola rimacinata. If it is further ground to a very fine texture, it is called durum flour.

Besides its texture, semolina has a pale yellow colour, has a more earthy aroma and it is rich in proteins but forms a low-quality gluten. This makes the dough less extensible and affects its structure.

However, there are some tricks that you can apply to overcome this issue.

  • First, you can improve the structure by adding strong bread flour into its composition and this is exactly what we'll do today.
  • Then, you can make a longer autolyse of 2-3 hours to develop the gluten to its maximum potential.
  • or you can increase the mixing time too for the same goal.

I invite you to watch the video of this bread to learn more tricks about it.


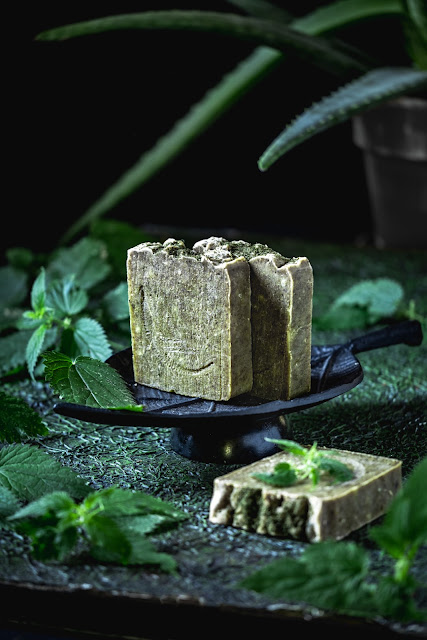
Nettle Aloe Vera Shampoo bar (version 2)


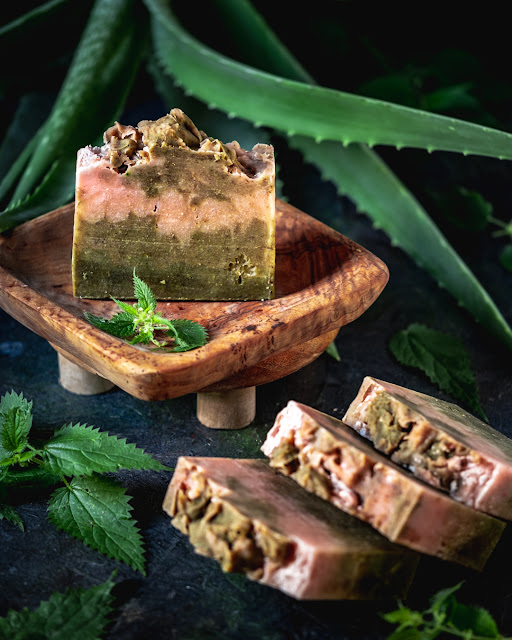
This is the second version of the Nettle Aloe Vera Shampoo bar and the last one in the series of recent soaps/shampoos.

Compared to the first version, this one is made in 3 layers (for decoration purposes) with rosemary, cedar and lavender essential oil. Made only with fantastic oils and butter for your hair, enriched with vitamin E.

Autumn soap

 Sometimes, when verifying the pantry I find some stuff stored that I should better use before expiring. This is the case with some special oils and butter. This soap has some interesting oils inside (avocado, coconut, grapeseed) and is flavoured with cinnamon and cloves essential oils. Almost sounds like autumn right? In one month we will be there ...

Nettle Aloe Vera Shampoo bar

Maybe once or twice a year I make my own cosmetics. My affair with homemade soaps and shampoos started some years ago when my childhood friend taught me how to do them. Since then I only use homemade staff.

Solid shampoo bars are my favourite because I can customise them to what I want. They are all natural and made by my own hands.
Recently I have done 3 types and I will share them here with you.

Tart Tatin in the style of Wiliam Lamagnère


I am rarely highly impressed by recipes but this one was a love at first sight. The idea of rolling the apple sheets is brilliant not only from the practical point of view but also from the way it looks.
I'm sure that everybody made an apple tart at least once in life as it is such a common desert and I thought I cannot be any more impressed. But this one, first is a French-style apple pie, known as Tarte Tatin, usually made with caramel sauce and turned upside down after baking. Second, it has such a special design that you'll rarely see entering a classic pastry shop. Third, although seems fancy and complicated, it is super simple in terms of preparation and the number of ingredients used.
What was more complicated to figure out was how to cut the apples into such long sheets. Cutting them by knife is almost impossible. Using a potato peeler maybe can help a bit but it can be frustrating. You need a special cutter for them. The French chefs know this cutter well to create all sorts of fancy fruits and vegetable decorations but the price for one is way too high for a simple home baker like me. I found however a cheap plastic alternative (compared to full metallic French versions) with a good blade. How long this will be working well, we'll see, but for its first usage did its job perfectly and I am happy about it. However, I am not sure how often I will use it in the future.

I was mentioning earlier its simplicity. This tart is about a puff pastry sheet, apples and a caramel sauce made from sugar and butter. It takes longer to bake properly (about 2 hours) and it needs to rest for at least 4 hours (or better overnight in the fridge) to set properly. Yes, it takes a long duration but there is not much work time consuming for the baker (assuming you have the right tools to make the apple sheets).

Now that I tried it, I feel I want to do it again and my imagination has just opened to lots of new designs.

The tart itself is wow just the way it is. If you haven't tried it before, I highly recommend it. The taste is fantastic and deep. It is sweet but not extra sweet. I think that sugar can be even more reduced and still keep it delicious.


Lavender Cake

Lavender is such a beautiful plant to grow in your own garden! When the flowers are blooming the life turns to a blue-violet color.

It is not the first time I use lavender in cakes, I've done Lavender Muffins and I loved their subtle flavour and aroma. Here I come now, with a little cake that turned out to be a great success as my kids loved it from the moment they've seen it. It was difficult to keep it for myself for some time just to film it and photograph it.

Rhubarb - Plums Tart

Oh no, not rhubarb again!
Last year I bought a little rhubarb tart and plant it in my garden. It grew up bigger the previous summer then, it almost disappeared during the winter. I knew that it should be harvested starting the second year, so I waited patiently. This early spring it grew up big, very big and I harvested it now for the 3rd time. This is how, here is the third rhubarb tart I make this summer! I took 2 big stalks, but not enough for a big tart, so I had to complement it with something else. I had in the fridge some very very sour plums, almost impossible to eat. It was the perfect element to add near the sour rhubarb in my tart. 
I planned to fill it in with my classing almond filling. But oops... I only had 70g of almond powder left. What to do? I added coconut flakes instead. I think this is the way we all do (don't tell me otherwise as I won't believe you), we replace things in the recipes that we miss. Unless you plan very well in advance you need to improvise, but improvise wisely with things that can work. 

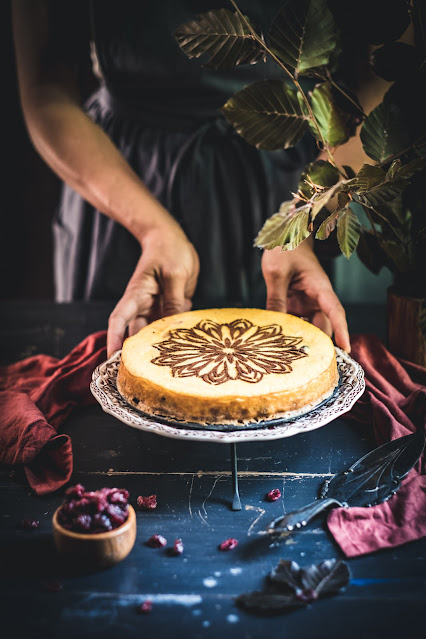
Red Berry Cheesecake in Instant Pot

I do not know why but I was always afraid of cheesecakes. Not to eat them but to make them. They crack, they are runny sometimes, and there are multiple ways you can get it wrong with a cheesecake. Well, Instant Pot opened a door for me. I hated the classical way of putting water on a tray and putting the pan inside a classical. What if the pan is not leakproof? Then, handling a hot water tray is not very pleasant. With the Instant Pot, things are simpler and with fewer negative surprises. But this is not a commercial post for the instant pot, it is just my opinion. You can definitely bake this cake in a normal oven too.

I made this cake in 2 versions, one including milk (or sour cream) and one without. The first one leads to a more creamy texture and the second one is more crumbly. The first one is soft, and the second is drier. I liked them both but my daughter detests cream texture in any cake. You can guess then which one was her favourite. 

You can do this cake without the fruity layer but it adds a full dimension to the taste of this cake. The first version I made was with strawberries, and the second was with raspberries. Both are exceptional and red berries are just an idea, you can use any fruit you want!

Sugar in this cake is kept to a minimum but it is just enough to enhance the taste of the cake. If you prefer very sweet cakes, feel free to add as much sugar as you like. Personally, I like cakes but I also like to stay on the healthy side of eating. Most of the time I do not eat the cakes that I make, they are for my kids but if I really want to eat a slice I would choose one that is the most appealing to me and this one was irresistible.

I hope you will like it too...

Instant Pot Cranberries Yoghurt Cake

I love baking in general, but steaming was not necessarily my daily way of cooking. I challenged myself to try pressure cooking lately and a whole new world opened to me. In fact, cooking with pressure was not a new thing for me. My mother gave me a big pressure cooker pot as a present at my wedding. I need to recognise it was a love and hate relationship... I was using it for a while then it was staying for months on the shelf. Now that I think back, I think the main reason was the practicality of that pot.
So, two lovely ladies told me about their experience with the Instant Pot and I convinced myself I want to try it. I can say it was a real turning point in how I am preparing my daily meals. In a short description: healthier and faster. I added as well to my family meals new dishes that looked so complicated before. Now everything happens in one pot...
I love to explore, to test the limits and I tried to bake cakes in it also. I understood what works in it and what is not. Instant Pot cooks with steam and moist types of cakes are appropriate. I baked a classic bundt and turned out OK but it was too dense for my taste. Then, I tried a creme caramel and worked perfectly. This time I made the yoghurt cake with a recipe from my mother. Of course, I had to adapt certain things but I am happy with the result.
This type of cake is usually baked in the oven between filo pastry sheets. I used a biscuit layer instead. I replaced raisins with dried cranberries (to be more accurate I think the ones that I have are actually lingonberries - in French is "airelles", please correct me if I am wrong).
What I love about it is that it is super simple to make it and it is firm enough to keep a slice on your hand and walk away. I gave it also to my kids at school as a snack.
You can play with some decorations and it will look as fancy as you wish.
If you do not have dried cranberries, use raisins or any dried fruits. I haven't tested but I think it works perfectly with fresh berries also. Good idea, I must try this too, could be very interesting.
This cake can be called a pudding. It works with the same principles, a cereal that expends in a diary liquid. What is special though is that I use homemade yoghurt, not milk. Almond essence and lemon zest give a specific and fantastic aroma to this cake.
It will for sure enter into my regular bakes due to its simplicity and delicious taste.

Here are the ingredients...

Rhubarb tart


Last spring, I've bought from the weekend market a little plant of rhubarb. It was a small plant and the guy selling it to me has warned me that it could grow up to 1m in diameter. All OK for me, I planted it in my garden and started to grow: unexpectedly big up to 2m in diameter at least. I knew that in the first year I better not harvested it, so I waited calmly for this year to come to taste it. Over the winter, it almost completely dried and I thought I lost it. But when this spring came, it was growing again at least as big as last year. This time... I had in mind a tart and now was the right moment.
A simple tart but with a lot of new things for me. First, it was about baking something with my own grown rhubarb. Second, it was my first tart baked in the wood-fired oven. None of these I've done before. The oven was low in temperature after a previous bake so I can almost say I did a slow bake. It started somewhere at 190ºC and went quickly a bit lower than 130ºC. I can call it a slow cook almost as it took about 3-4 hours to finish it and that with the tart shell already pre-cooked.
I was expecting the stalks to be redder but the lack of sun and good weather of this year had for sure an impact. Nevertheless, I had to try it!
The tart was incredibly well received by my daughter who enjoyed the sweet-sour taste of it and she commented that remembers the three kings' cake. Of course it does, as the filling is very similar to that cake, being based on almond powder. Just when it was gone I realised that I did not save a piece for me to try. Well, the plant is still there with big leaves but I won't dare to cut more stalks to not kill the plant. So for me, the next attempt to taste it will be next year.
Here is the simple recipe.

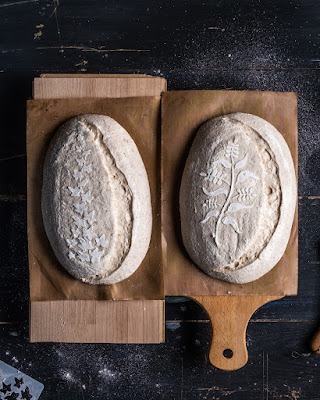
Rye - Whole Wheat Sourdough Bread


Take a bread recipe, make it until you are satisfied with the result and then you can play changing the flour. This is what I am doing with this recipe: I changed the spelt flour with rye flour in my previous recipe. The result may have the same look but there are big changes to the dough and I'll explain why. 
The spelt flour makes the dough very elastic while rye is fermenting faster. Rye flour is also more absorbent (at least mine because it is partially whole rye).
So, the spelt version needed more coil folds to build the structure while rye has already a good structure feeling stiffer. Fermentation time was reduced also.

If the aspect is similar, the taste is slightly changed. Rye flour comes with a more rustic taste while spelt has sweeter influences. Do I like one more than the other... hmmm... difficult to say. They are both sourdough bread and the taste is amazing in both cases. The differences are just a matter of nuances.


Here you can find the recipe:

Spelt - Whole Wheat Sourdough Bread

 When you make a dough combining multiple types of flours you should be very careful about the effect each dough has. Usually, if you put a type of flour in a percentage lower than 10%, the influence is minimal in the dough consistency and mild in the taste. When you increase this percentage, the characteristics of this specific flour start to be noticed. 

I made this bread with 3 types of flour: whole wheat, spelt and bread flour. Whole wheat is more absorbent and impedes the gluten network to develop easily. That's why a trick is to hydrate the whole wheat flour the day before so that the bran is softened through better hydration. The spelt flour adds elasticity to the dough. This means that you can stretch it more. The extensibility of the dough then has to be created by adding an extra coil fold. (the 4th one). The bread flour I used, although with 13% protein content was also very extensible and less absorbent than others I normally use. With these characteristics, making this bread is tricky.

First time I tried it I was not very happy with its dough structure and I over fermented it. The bread was perfectly eatable but for sure, was not what I expected it to be.

With the lessons learned from this first failed attempt, I focused on improving 2 things: dough handling and reduced fermentation time while keeping the list and quantity of ingredients exactly the same. To build a better structure, I added a 4th coil fold. For the fermentation, I definitely understood that this combination of flours, had to have a higher ph than 4.15 (as my previous test was). I shaped it then at ph 4.33 and put it in the fridge at 4.25. Only these 2 changes transformed a recipe from zero to hero.

This is a perfect example of improving the method and not changing the ingredients or their quantity. The method matters! There are many methods out there that make fantastic loaves of bread but you need to master yours and know the implications of changing it.

Chocolate festive cake


Chocolate festive cake


This was the cake for my husband's birthday last week. It was also the test cake for my son's birthday cakes. All the 3 followed the same principles, one sponge cake cut into layers with chocolate ganache between them. Similar compositions and tastes but three different looks. You may find the ones of my son in my previous 2 posts. 


Every cake had a different target: this one to look more festive, the "5" cake to be a child's cake and the last one to be easily transported. Which one do I like the best? Difficult to say as I associated them with special occasions. Doing all of them in one week was a marathon but with every challenge like this comes a lot of lessons learned.


The first lesson learned was to master the sponge cake both in cocoa or classic versions. Learning its tricks took me sometime over the years and now I can happily say that I feel comfortable baking them.


A second lesson learned was to play with ganache. This thing is super sensitive to temperature and depending on the purpose you might want a thicker or thinner texture. I found myself putting the bowl sometimes in the microwave to heat it a bit and sometimes in the fridge to cool it. It is however the easiest cake filling that you can do (after the basic whipped cream of course). I like simple things for basic staff and focus more on the artistic part of it.

You may find the complete recipe for this cake below.

Race cake


This was the anniversary birthday cake of my son. It took me a lot of time to prepare it and even more to make all the decorations. do I regret spending so much time on just a cake? Not even a minute. I made it with all my heart and I would do it again if needed.

I divided the making of this cake over 2 days: on the first day, I baked the sponge cakes and prepared the ganache, on the second day I shaped and layered them and prepared all the decorations.

The decorations took me almost a full day and I was helped by the little one, placing the big white and black squares on the side. My daughter participated also in the decoration process so it looked more like a family cake.

But a good cake doesn't only have to look nice it also needs to taste good. The combination of cocoa sponge cake and chocolate ganache is heaven. The guests appreciated the cake to be light, not overly sweet and delicious. The kids invited to the party loved it too, as most of the plates I cleaned up after were empty.

I was very careful with the sugar on this cake. There is a huuuuge (for me at least) amount of sugar paste (~750g) to cover the cake. The sponge cakes have 200g of sugar each, but I used only 1.5 sponge cakes, so I can make a total of 300g. There is also a good quantity of sugar in chocolate and there is no need to add more. Then another 100g for the syrup. If you start counting, the sugar sums up, however, remember that chocolate in its pure state is bitter and children do not love it like that. So a certain amount of sugar in this cake is a must. The trick was to find the right balance and I can happily say it was perfect.